Maintaining your lawn to perfection requires regular care and attention, and one of the key components in this process is ensuring that your ride-on mower blades are sharp and in good condition. Dull or damaged blades can result in uneven cuts, stressing your lawn and making your mowing efforts less effective. If you’re unsure whether it’s time to replace your mower blades or need guidance on how to go about it, this blog will walk you through everything you need to know.
Why Should You Replace Your Mower Blades?
Over time, mower blades wear out due to regular use and contact with various debris such as rocks, branches, and tough grass. As the blades become dull, they tear the grass rather than cutting it cleanly, which can lead to browning and uneven patches. Damaged or worn-out blades also put extra strain on your mower’s engine, reducing its efficiency and lifespan. Regularly inspecting and replacing your mower blades can:
• Improve the quality of your lawn cut.
• Enhance the health of your grass.
• Increase your mower’s efficiency.
• Extend the lifespan of your mower.
Signs That Your Mower Blades Need Replacing
Knowing when to replace your blades is essential for optimal mower performance. Here are the key signs to watch for:
1. Uneven Cuts: If your lawn is left with ragged or uneven patches after mowing, this is a clear indication that your blades have become dull or damaged.
2. Excessive Vibration: If you notice increased vibration or unusual noises while mowing, your blades might be imbalanced or chipped.
3. Visible Damage: After inspecting the blades, if you see significant dents, cracks, or warping, it’s time for a replacement.
4. Rust: Rusted blades can degrade quickly and should be replaced to avoid damaging your mower or lawn.
How Often Should You Replace Mower Blades?
The frequency of replacement depends on several factors, such as the size of your lawn, the type of grass you mow, and how often you use your mower. Generally, most experts recommend replacing your mower blades after 25-30 hours of use. However, it’s essential to keep an eye on their condition and replace them sooner if you notice any of the above warning signs.
Steps for Replacing Your Ride-On Mower Blades
Replacing ride-on mower blades is a relatively simple task that can be done at home with basic tools. Here’s a step-by-step guide to help you through the process:
1. Safety First: Always prioritize safety when working on your mower. Ensure the engine is turned off, remove the key, and disconnect the spark plug to prevent accidental starts. It’s also a good idea to wear gloves and protective eyewear.
2. Position the Mower: To access the blades, you’ll need to safely lift the mower. Some people use a mower jack, while others may drive it onto ramps or simply tilt it carefully. Ensure the mower is stable before proceeding.
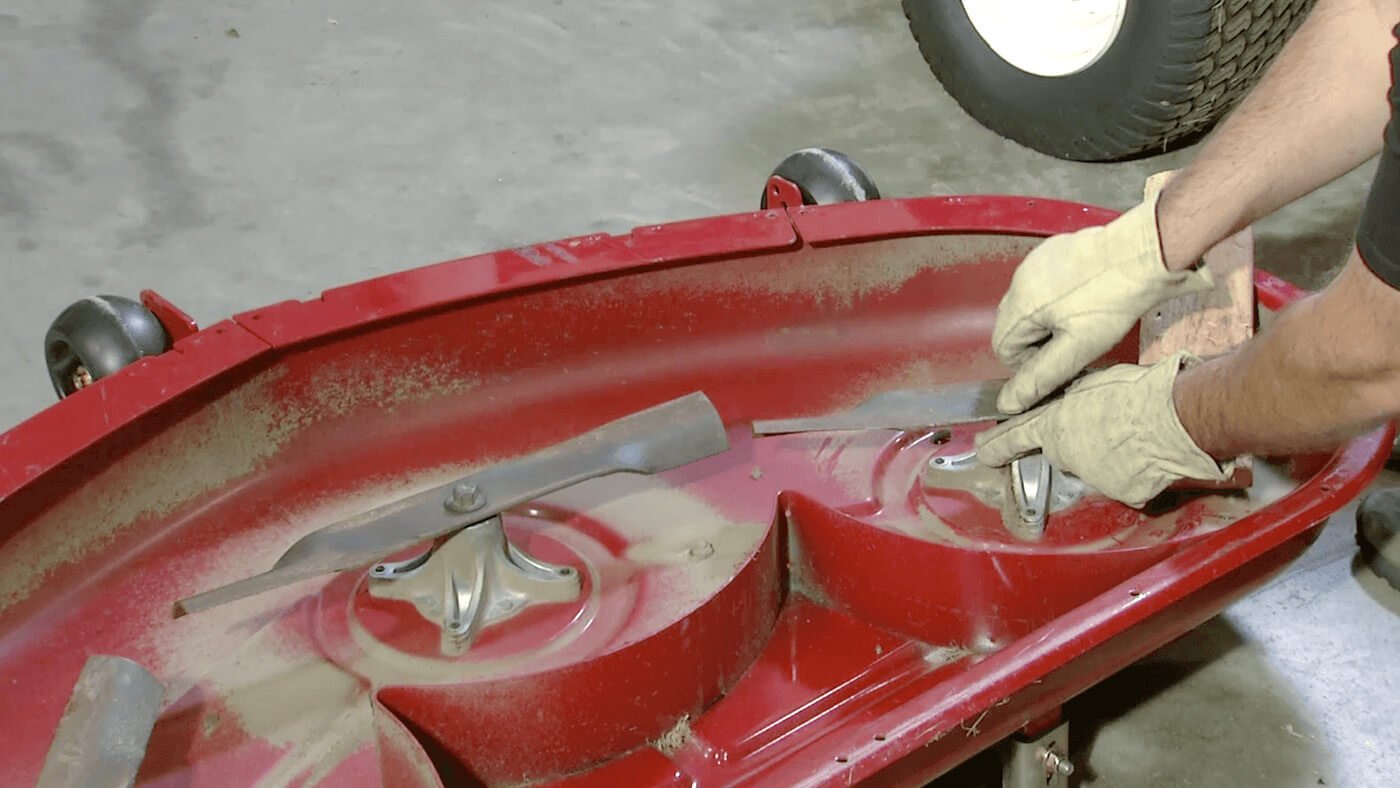
3. Remove the Old Blades: Use a socket wrench to loosen and remove the bolts that hold the blades in place. Be cautious, as the bolts may be tightly secured. Once the bolts are removed, take off the old blades.
4. Inspect the Mower Deck: Before installing the new blades, take the opportunity to inspect the mower deck for any debris or damage. Clean out any built-up grass or dirt that may have accumulated.
5. Install the New Blades: Align the new blades in the correct orientation (refer to your mower’s manual for guidance) and secure them with the bolts you removed earlier. Ensure the blades are tightened properly but avoid over-tightening, which could damage the bolts.
6. Reconnect and Test: Reconnect the spark plug and start the mower to test the new blades. Pay attention to how the mower feels and sounds. A smoother cut and reduced vibration should be immediately noticeable.
Maintaining Your Mower Blades
To get the most out of your ride-on mower blades and reduce the frequency of replacements, regular maintenance is key. Here are a few tips to help:
• Sharpen the Blades Regularly: Instead of waiting until the blades become completely dull, sharpen them every 8-10 hours of mowing. This will maintain a clean cut and prolong the life of your blades.
• Clean After Every Use: Grass, dirt, and moisture can build up on the blades, leading to rust and corrosion. Cleaning them after each use will help prevent this.
• Store Properly: If you’re storing your mower for the off-season, remove the blades and store them in a dry place to prevent rusting.
Replacing the blades on your ride-on mower is a simple yet vital part of lawn care that can dramatically improve your mowing results. By paying attention to the signs of wear and following the right maintenance practices, you can ensure your mower remains in top condition, and your lawn looks its best all season long. Whether you’re a seasoned mower operator or new to lawn care, keeping your mower blades sharp and functional will save you time, effort, and frustration in the long run.


