When it comes to maintaining your yard, a Stihl trimmer can be your best ally. Known for their durability, performance, and precision, these trimmers help you keep your garden edges neat and tidy. However, even the sturdiest tools need maintenance, and replacing the trimmer head is a common part of this process. Choosing the right Stihl replacement trimmer head can significantly impact your trimming efficiency and effectiveness. This guide will walk you through everything you need to know about Stihl replacement trimmer heads.
Why Choose Stihl Replacement Heads
Stihl is a brand synonymous with quality and reliability in the world of garden tools. Their trimmer heads are designed to offer maximum efficiency, durability, and ease of use. Opting for a genuine Stihl replacement head ensures compatibility, performance, and safety. While aftermarket options might be tempting due to their lower price point, they often can't match the longevity and performance of genuine Stihl parts.
Types of Stihl Trimmer Heads
AutoCut
The AutoCut head is user-friendly, allowing for easy line reloading without the need to disassemble the head. It's ideal for homeowners and professionals who value convenience and efficiency.
PolyCut
The PolyCut head is versatile, capable of using both nylon lines and plastic blades. This makes it suitable for tackling both grass and thicker brush, offering flexibility based on your trimming needs.
DuroCut
The DuroCut head is designed for more demanding tasks. It can hold several lengths of line simultaneously, providing a robust cutting performance suitable for tougher vegetation.
FixCut
The FixCut head is a simple, robust option designed for cutting through heavy brush and thick grass. Its fixed line length makes it easy to replace the cutting line, ensuring you spend less time on maintenance and more on the task at hand.
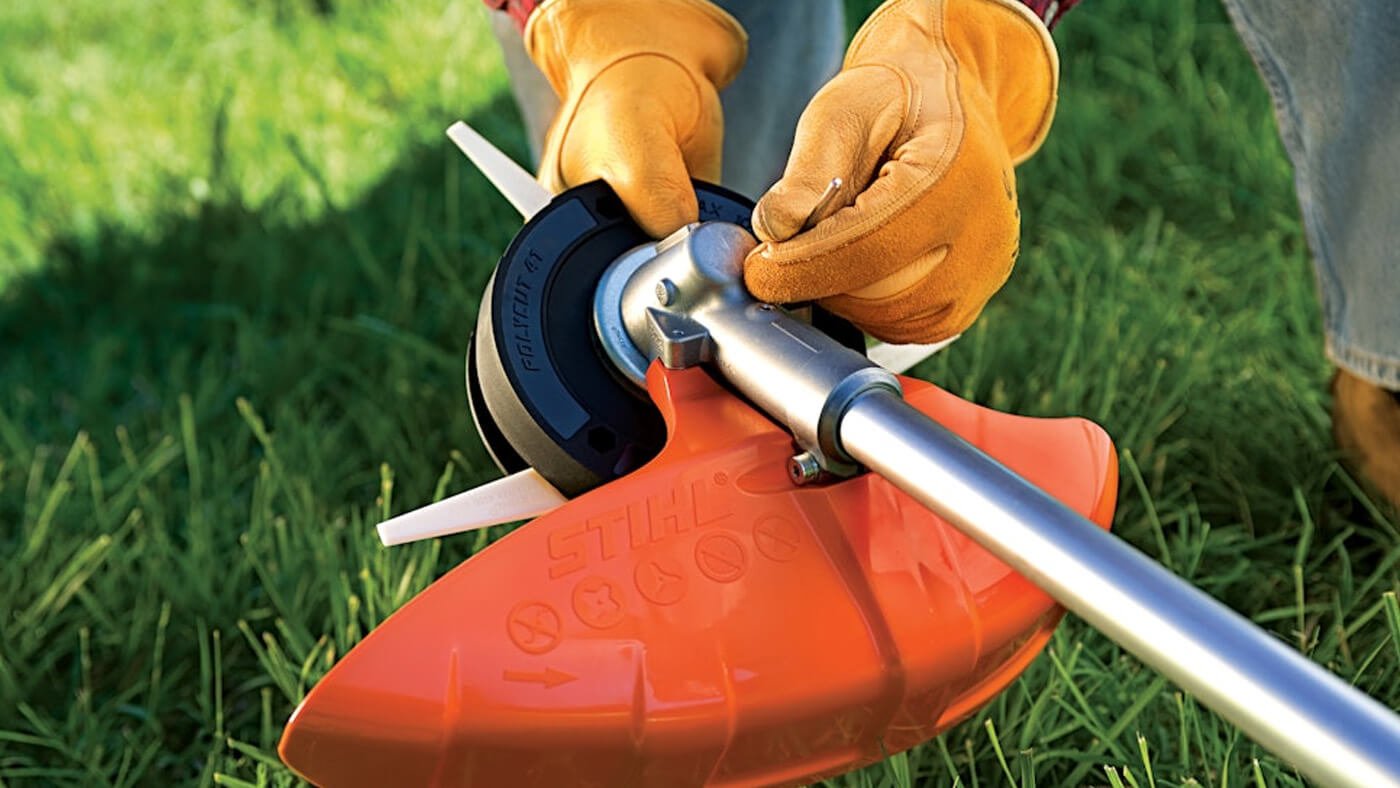
Installation Tips
- Safety First: Always ensure your trimmer is turned off and disconnected from its power source before attempting to replace the trimmer head.
- Refer to the Manual: Before installing a new head, consult your Stihl trimmer's user manual for specific instructions and compatibility.
- Tools: Gather any tools you might need for the installation process, such as pliers or a screwdriver, depending on your trimmer model.
- Alignment: Make sure the new head is properly aligned with the trimmer's drive shaft before securing it in place.
Maintenance and Care
To ensure your Stihl trimmer head lasts as long as possible, regular maintenance is crucial. Clean the head after each use, removing any grass, dirt, or debris. Check the condition of the cutting line or blades and replace them as needed to maintain optimal cutting performance. Store your trimmer in a dry, safe place to avoid any unnecessary wear and tear.
Choosing the right Stihl replacement trimmer head can make all the difference in your gardening routine. Whether you prioritize ease of use, versatility, or cutting power, there's a Stihl trimmer head designed to meet your needs. By selecting the appropriate head, following installation tips, and performing regular maintenance, you can ensure your Stihl trimmer continues to be a reliable partner in your garden maintenance for years to come.